
Everything You Need to Know About Vinyl Lettering
There are so many vinyl products out there on the market, sometimes it’s hard to tell the difference between them. Vinyl lettering, for example, is sometimes confused with graphic vinyl wraps or, worse, assumed to be the same as letter stickers sold in craft stores. Here, we’ll go over everything you need to know about vinyl lettering, from the basic to the nitty-gritty.
Contents:
What is Vinyl Lettering?
Put simply, it’s the industry term for individually cut, solid-colored vinyl designs, be they letters, numbers, shapes, or simple logos. Vinyl lettering is generally not printed, but rather cut from a roll of colored vinyl. Although the characters in vinyl lettering are separate from each other, they are applied as a group with the help of transfer tape.
Vinyl lettering usually comes in three layers. The top layer is transfer tape, which holds the letters and characters together in their proper spacing on the non-adhesive side. The middle layer is the cut vinyl itself, which comes with one side coated in adhesive.
The bottom layer is a plastic or waxed paper backing, which protects the adhesive until installation time. During installation, the backing is removed to allow the adhesive to stick to the substrate, while the transfer tape stays on and holds everything together until the lettering is secured in place.
Vinyl lettering is removable, but not re-positionable. If you’re looking for a wall decoration that can be reused and re-positioned, you may want to consider custom-printed graphic vinyl.
Specifications*
One of the best things about vinyl lettering is that it’s nearly flat – just 0.063-0.09mm thick, including the adhesive layer! This means that once it’s on, it practically looks like a part of the surface.
Moreover, it means there’s not much that can get under it and peel it up. For this reason, decals have largely replaced hand-painted signs on storefronts and vehicles.
Of course, its adhesion stats don’t hurt:
- 4 pounds/inch on ABS, Acrylic, Acrylic enamel, Polycarbonate, and Urethane paints
- 8 pounds/inch on Aluminum
- 5 pounds/inch on Chrome
- 3 pounds/inch on Polypropylene
… and a tensile strength of 5 pounds/inch at 73 degrees Fahrenheit.
Vinyl lettering comes in a remarkable range of colors, finishes, and adhesion strengths from different brands. If you need something really specific, chances are that somebody makes it. For example, here’s just a sampling of colors from our preferred brand, 3M:

*Specifications based on 3M™ Scotchcal™ Electrocut™ Graphic Film. Specs for other products may vary.
What Can I Use it For?
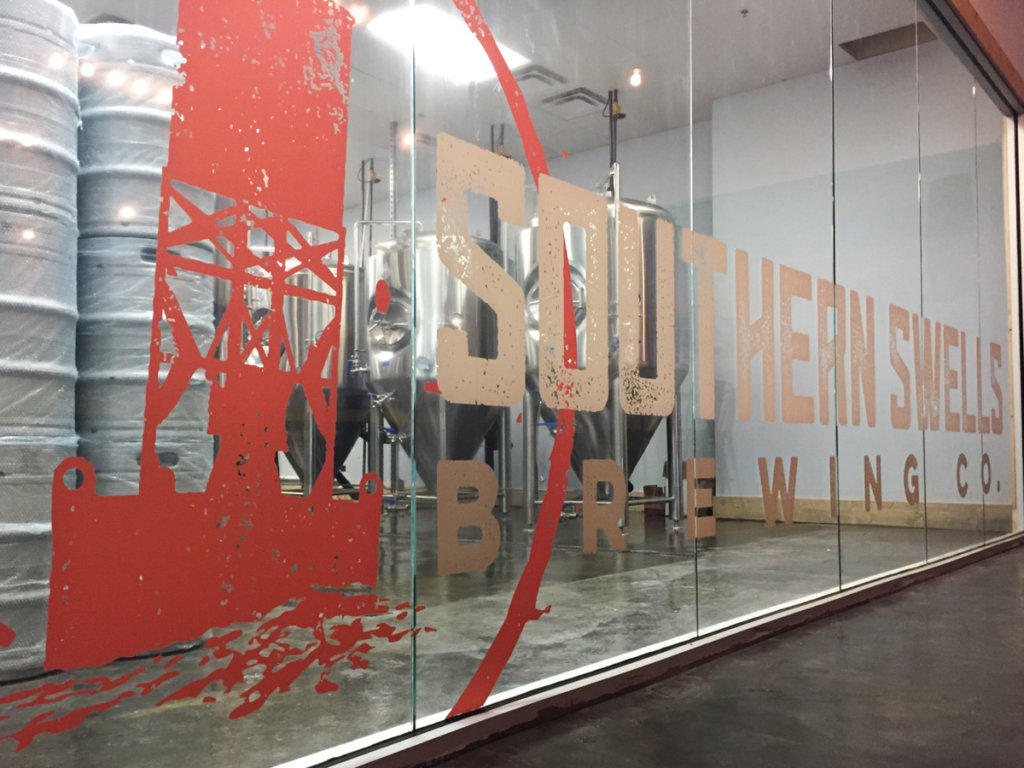
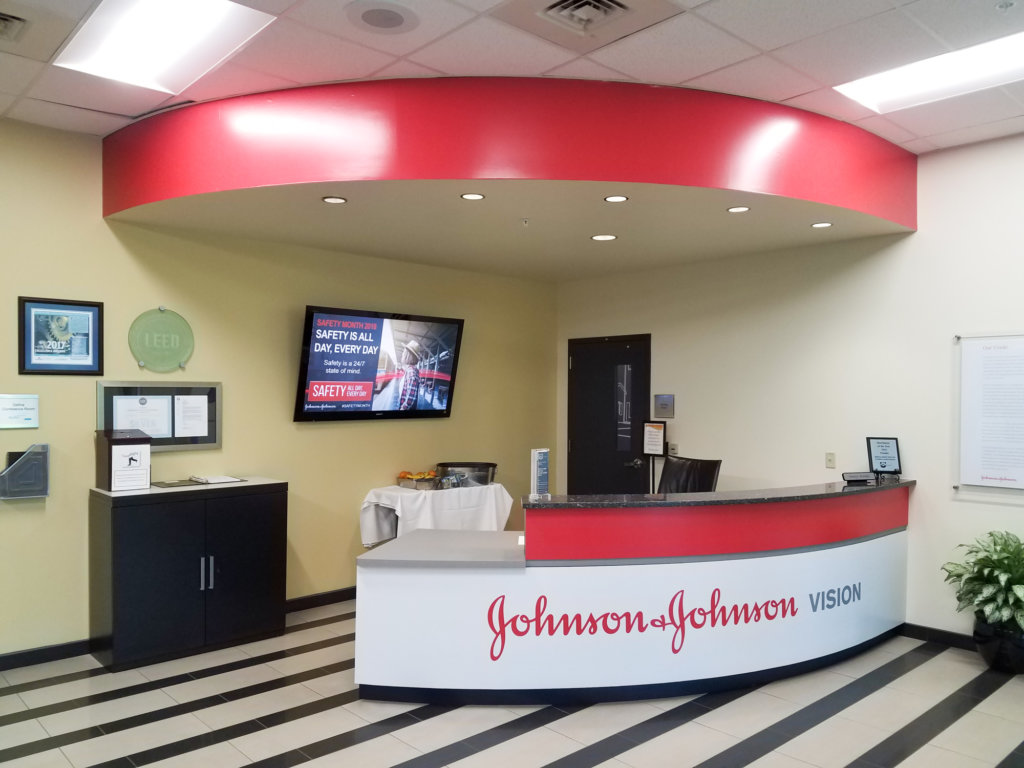
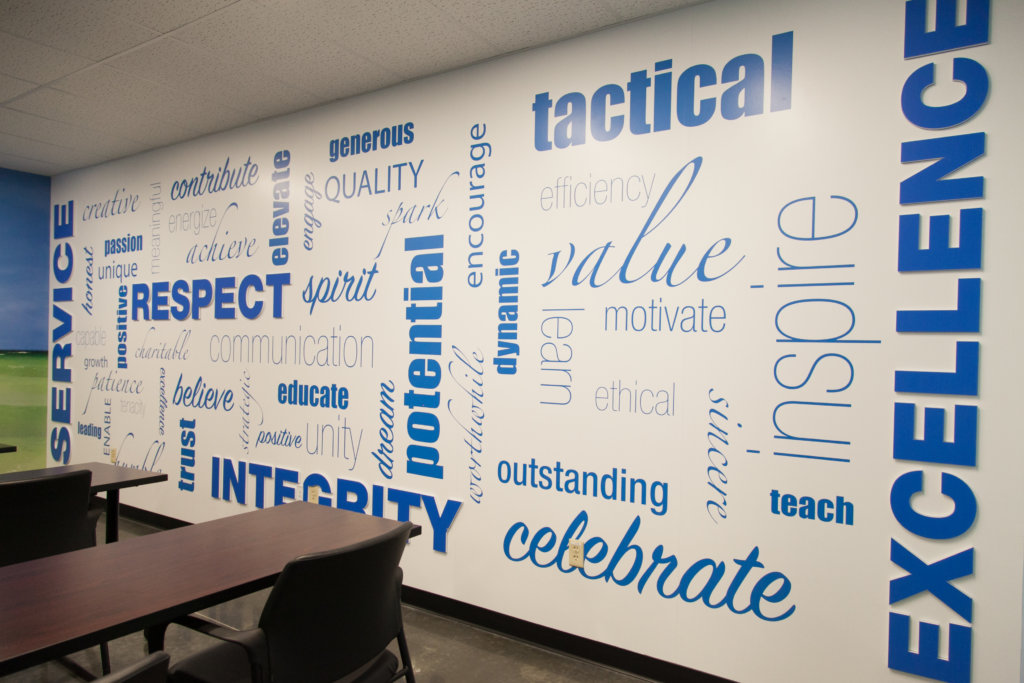
Vinyl lettering is extremely versatile because it can stick to almost any flat, non-porous surface. Common applications include graphics and information for glass storefronts, inspirational wall quotes, branding for work vehicles, fancy bumper or window stickers, boat names, and much more.
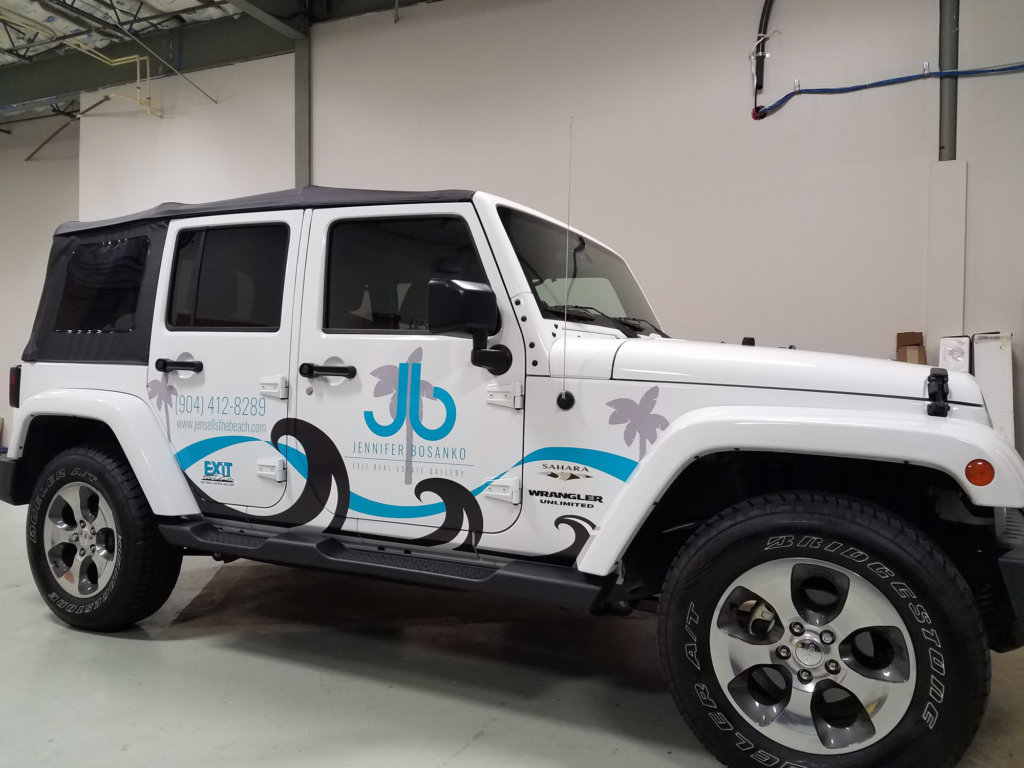
Lettering can withstand indoor or outdoor conditions, making it a great solution for exterior building signage (like basic window graphics or business hours) or vehicle signage (like company names and phone numbers). However, it does last longer when it is protected from the elements.Most kinds of vinyl lettering can also be “reverse-cut” for application to the inside of glass doors or windows for greater protection.
The only downsides are that the adhesive side, which is less vibrant, becomes the viewing side, and glare or reflection on the outside of the glass can make the letters difficult to see.You may find yourself wondering “What about those letter stickers from the craft store? Can’t I use those?” Our answer to that question is an emphatic “NO!”Those stickers are meant for crafting – indoor, temporary applications to surfaces that are not likely to suffer much damage from them.
While they may look nice on the sheet, they can turn nasty very quickly when exposed to the elements: think peeling, cracking, and oozing excess adhesive around the edges. Plus they’re near impossible to apply evenly, and they leave a tenacious residue when you finally remove them. We could go on and on… please, just save yourself the trouble and leave the stickers for scrapbook enthusiasts.
How is Vinyl Lettering Installed?
We strongly recommend purchasing your lettering from a company that provides professional installation services, especially if your designs are delicate, involve multiple color layers, or are cut from permanent adhesion vinyl.
In addition to making your life easier, professional installation can increase the longevity of your product, reduce the risk of damage to the substrate, and possibly qualify it for a manufacturer warranty.
However, if you need to install vinyl lettering or a die-cut vinyl decal on your own, you’ll just need a non-abrasive rag, a mild cleanser, a ruler, masking tape, a squeegee, and some patience:
Step 1
Look at your decal. Note which side of the surface it is meant to be installed on: If it goes on the outside of the surface, the lettering will be readable from the transfer tape side. If it’s reverse-cut for application to the inside of a glass surface, the lettering will be readable from the adhesive backing side.
Step 2
Prep the application surface. Make sure the surface is smooth, non-porous, and free of greasy or oily coatings. Clean it using a non-abrasive rag and a mild cleanser that won’t leave a residue or damage the surface. Allow the surface to dry completely before beginning installation.

Step 3
Measure and mark your application area to determine where the vinyl will go. Make sure that the area is leveled, spaced, and aligned the way you want it.
Step 4
With the backing and transfer tape still on the vinyl, hold it in place exactly where you wish to apply it, making sure that the backing side is facing the surface. Once you have the decal where you want it, secure the top edge with a horizontal strip of masking or painters tape so that the top half of the tape is on the application surface, creating a hinge.

Step 5
Flip up the graphic from the bottom, allowing it to hinge at the tape that you’ve attached it with. Remove the backing (NOT the transfer tape) from the vinyl, being careful not to let anything touch the now-exposed adhesive surface. Save the backing liner – you may need it later.

Step 6
Without allowing the adhesive to touch anything yet, carefully flip the graphic back down so that the adhesive side is once again facing the surface.
Step 7
Using a vinyl installation “squeegee”, start to apply pressure to the top left corner of the transfer tape side of the lettering, pressing the graphic onto the surface. Work from left to right as you move from the top of the graphic to the bottom. Always squeegee in the same direction to avoid trapping air bubbles. If any creasing or bubbling happens, don’t panic. Just carefully lift the problem area up off the surface and try again.

Step 8
When the vinyl has all been squeegeed into place and there are no bubbles or creases, go over the whole graphic one more time with the squeegee to make sure that everything is pressed and adhered firmly. Pay special attention to corners and edges, which could peel up with the transfer tape later if they aren’t fully adhered.
Step 9
Lift up the top left corner of the transfer tape and begin slowly peeling it away from the graphic. If any of the vinyl lifts with it, use the squeegee to press it back into place, then continue peeling off the tape.

Step 10
If removing the tape reveals any stubborn air bubbles that you didn’t see before, take the backing liner that you saved earlier and lay it over the problem area with the shiny side facing you. Then, use the squeegee to apply hard pressure and try to work out the air bubble.

Step 11
If your graphic requires the application of more than one color, repeat this whole process with each remaining color sheet, making sure to line everything up perfectly.
Sound complicated? It kind of is. Don’t worry, though: professional installers are easy to find.
How Should I Maintain My Vinyl Lettering?
Caring for your vinyl lettering properly is an easy way to keep it looking good for as long as possible.
According to 3M, the post-application factors that most affect longevity are the angle and direction of sun exposure, general environmental conditions, and cleaning and maintenance methods. Luckily, depending on the surface the lettering is on, some or all of those factors are within your control.
If the vinyl is on a vehicle or movable object, try to keep the object indoors or under a cover when not in use. This will limit exposure to UV rays and temperature changes that can damage the composition of the material.
The best way to keep letters clear of grime is to wipe them down frequently with a damp, non-abrasive cloth. Do not use chemical cleansers for regular care; they can damage the vinyl and adhesive over time.
If the vinyl is on a vehicle, hand washing with a mild detergent is fine, but be sure not to use abrasive cleaning tools or brushes. Rinse the area thoroughly with clean water to remove all detergent. Allow it to dry naturally.
Automatic vehicle washes from time to time are ok for higher-strength adhesive vinyls. However, they can dull appearances or loosen the vinyl, potentially causing it to peel off during driving time and create a hazard for other vehicles. Always check the your vinyl after cleaning to ensure that it is still firmly attached.
Clean the area around the vinyl as you normally would, without letting any solvents, waxes, or abrasives contact the vinyl.
What If I Want to Remove My Vinyl Lettering?
When it’s time to remove and replace your vinyl lettering, the method you’ll want to use will depend on the surface and type of vinyl you’re working with.
Important Note: Certain types of vinyl used for lettering are designed to be permanent and may cause damage to the surface if removal is attempted. Always ask your provider what kind of vinyl they are using before they install it to be sure you’re getting the product you want. Do not attempt to remove permanent lettering on your own.
If your vinyl is meant to be removable, you may not have to remove it yourself – ask the company that is providing your new vinyl if they are willing to remove the old vinyl as part of the surface preparation. Vinyl professionals generally prefer to do the surface prep themselves to ensure that it’s done right.
For most solid surfaces, a flat razor blade can be used to scrape the vinyl off. However, if you are removing the lettering from glass or from paint that you’d rather not risk scraping, you can use a hair dryer set to “low” to warm the letters until you are able to peel them away by hand.
Once the letters are removed, any remaining residue should come off with the gentle application of window cleaner or diluted rubbing alcohol.
Vinyl letters are not made to be re-positionable or reusable, and can stretch or break into pieces during removal.
So, Now You’re a Vinyl Lettering Expert
Go forth and share your knowledge with the world! Or… just use it to make better decisions when considering signage and decor options for your home or organization. Either way, when you do decide, keep us in mind. We’re experts in vinyl production and installation, and we’re always eager to answer questions and give advice.
Did we miss anything you wanted to learn in this article? Did you learn something that blew your mind?
Let us know in the comments!